The filling for this cake was an almond buttercream. The buttercream filling is different from the frosting in that it's not a Swiss (or meringue) buttercream, but a traditional one that uses yolks. I struggle a little bit with this one, because I feel like the yolks don't do quite as well as the whites. But I made a devil's food cake with this frosting for practice, and I think I got it pretty well.
I roasted almonds, ground them in the food processor, and then folded them into the buttercream. Then I chilled it to help it set up for spreading on the cakes.
I then defrosted the cake layers and the buttercream for the frosting and got to work. I follow the Test Kitchen procedure pretty exactly. I start with the largest layers and work my way up. If any of the layers look like they're uneven on top, I gently saw them off with a serrated knife. I only had to do this with one, as I do my best to even the batter before putting them in the oven.
Then I place the tiers on cake boards, wrap with Saran Wrap,* and put them in the freezer to set up for a few hours. After they've set up, I re-heat and whip the buttercream frosting and begin frosting the tiers separately.
This wedding cake was to have what we dubbed the "messy" frosting, somewhat like the picture below. I searched the internet for directions or similar examples, and didn't find any, so I went with my best guess of what I thought it could be.
I always do a "crumb layer" of frosting first. This is a thin layer of frosting that catches any extra crumbs coming off the cake, to keep it from marring the thicker layer of frosting. After the crumb layer, I put the cake in the refrigerator to set while I move on to the next tier. Then I frost each tier fully, going for the final look. I reserve some frosting for touch ups and piping for cake set up.
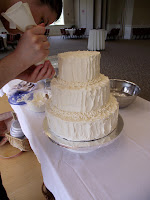
I usually do all of this the day before the wedding, to let everything set up in the refrigerator, and to give me time if I need to fix anything. I then transport the cake in its separate tiers to prevent any potential damage. I put it all together on site. Then I pipe in frosting, in this case, added texture to mimic the example photo, to cover the cake boards between layers. (Many thanks to my sister in law, Liz, for being my photographer for this set-up!)
I spent a lot of time making sure that the layers were even and that the best side was presented to the front. I usually end up marking the "back" on each tier as I am frosting them, as there is always one side that looks a little worse than the other. I try to line the "bad" sides up so they all face the back and the front is perfect.
*Side note and endorsement of Saran Wrap: I love Saran Wrap. It is manufactured by S.C. Johnson, A Family Company. I am a lifetime loyal customer of theirs for 2 reasons: 1- They sponsored OBJECTS: USA, the exhibition I wrote my graduate thesis about. When I contacted their archive for information on the exhibition, their archivist sent me more than I asked for, as well as samples of their products. I was sold. 2- Saran Wrap is way better than Glad Cling Wrap as Cling Wrap clings to nothing but itself.


