Last night I was making dinner when I saw an email from my dad. He wrote to tell me he saw that Sally Ride had passed away and wanted me to know because I'd wanted to be an astronaut when I was a girl. I stood in my kitchen, tearing up at how sad I was at the loss of a hero and how touched I was by my dad caring and knowing me well enough to know I'd want to know that.
I admired Sally Ride as a girl because I wanted nothing more than to be an astronaut. I had a poster of all the Apollo mission astronauts on my wall where I'm sure other girls my age had New Kids on the Block. Even though every person on that poster was a man, because of Sally Ride, I knew that it wasn't impossible for me to become like one of those men. She made it okay for me to follow those boot prints.
As I got older and moved my childhood aspirations to other things, I continued to admire Ms. Ride because of her passion for math and science. Yes, she wanted to help young women move up in those field, but she also wanted to help young men. She was passionate and shared that passion every day in how she chose to live out her life's work. I moved away from the math and science fields, but I continued to pay attention to her work because she cared in a way that made me care.
Now, as a art historian, I'm in a very female-dominated field. However, 100 years ago, it would have looked like science and math fields do today. My hope is that Sally Ride's legacy will continue, that others will step up to fill her shoes, and one day math and science fields will look more similar to my field. More importantly, may we all follow her footsteps in living out our passion. When we live our passion, we help the world in so many ways by bringing our best selves to the forefront.
Thank you, Sally Ride, for being who you were. For sharing your self, for sharing your passion, and for inspiring so many. May your legacy burn bright.
*only a few tears were shed in the writing of this post
Tuesday, July 24, 2012

Sunday, June 10, 2012
Wedding Cake Update
I bet you're wondering how the wedding cake turned out. In a word: AWESOME.


Maybe people were lying to me, and maybe I was in a haze of joy with it being my wedding day and all, but that cake was amazing. Here's how it all came together...
2 weeks before the wedding: I took a Saturday and spent the entire day baking the cakes. It took 3 rounds, and approximately 10 hours. Add in a cranky oven that doesn't heat evenly or properly, and I had to babysit those cakes while they baked. But it all turned out okay. I put each layer on a cardboard cake round, wrapped it in lots and lots of Saran wrap, and carefully put it all in the freezer. Amount of butter used: 2.25 lbs.

1 week before the wedding: I made the fillings. We decided on one filling of chocolate and one filling of mocha. Seeing as I had bad results with the filling in my practice run when I used the microwave, I rigged up a double boiler and felt very satisfied with the results, even as I was pouring the filling mixture into containers for storage. This was the fastest stage of cake-making. Amount of butter used: none. However, 4 1/2 cups of heavy cream were used, as well as 24 oz. of chocolate.
4 days before the wedding: I made the buttercream. This didn't take as long as baking the cakes, but the whipping portion of the recipe takes a very long time. You want nicely whipped, fluffy, smooth buttercream, which takes about 20 minutes for each batch. I probably spent close to an hour just staring at my KitchenAid. Also, I spent a lot of time thinking about my late grandmother, who gave me the mixer. I think she would be pleased with how it was being used. Amount of butter used: 3 lbs.

2 days before the wedding: This is where things got fun! I woke up that morning with a headache and feeling queasy. But my amazing friend, Heather, came to my rescue and spent most of the day with me, chatting, helping with other things, and calming me down. By that afternoon, my friend Elizabeth (who is an organizational wizard and is responsible for much of the smooth flow of our reception), had shown up and they watched as I assembled. In the morning, I took the cakes out of the freezer to defrost, letting them come to room temperature.
To assemble the cakes, I did it by layer size. I had three 12 in. layers, three 9 in. layers, and three 6 in. layers. I unwrapped, and with the help of my trusty assistants, determined the best order for them to go in to create the tiers. I then whipped the chocolate filling and proceeded to create the first two layers of each tier, with the chocolate. Then I repeated, but with the mocha filling, adding the top layer of cake to each tier.
Then came the buttercream. Oh. my. goodness. Reheating and then re-whipping that frosting was like alchemy. It was beautiful. I frosted each tier, and then left them on cardboard cake rounds and stuck them in the fridge to "rest" overnight.
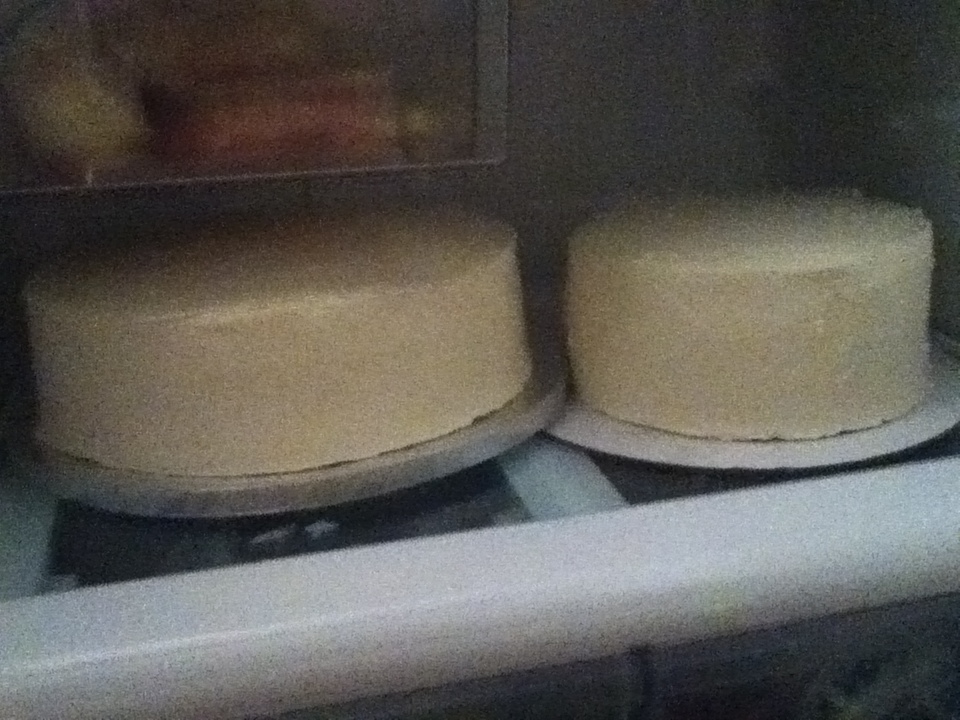
1 day before the wedding: That morning, each tier was lovingly nestled in a box cut to size with no-slip shelf liner on the bottom. The cake was then transported by car to the church, with one of the tiers riding on Greg's lap. (I insisted on driving, since I might have been a little overprotective.) Upon arrival at the church, I began to put the tiers together, following the instructions of America's Test Kitchen, and using the aid of my dear friend, Lenora. I had one final batch of buttercream to whip, but I couldn't seem to find a mixer in my church's kitchen, so Greg and I took turns hand whipping. It came out okay. The frosting was much easier to smooth once it was chilled. I was able to fix a few spots that were bare or uneven quite easily. I would dip my frosting spatula in hot water and run it over the surface to smooth. I was quite proud. I then loaded up my pastry bag and began to pipe our pearl border on. I wanted it to be simple for a few reasons, the main one being that I didn't want to overly stress about elaborate frosting decoration. After an hour or so, we tested it with the cake topper, declared it perfect looking, and carefully slid it into a fridge.
Wedding day! I got my hair done. I went to the church. I did a few things. I asked (the aforementioned) Heather and a bridesmaid, Julia, to assist me with the cake. I set up the cake stand I'd made (from plywood, spray paint, ribbon, and knob pulls) on the table, we carefully pulled the cake from the fridge, and wheeled it to the table. Where we discovered that in my worry about the door hitting the cake, I'd pushed it all the way back into the light for the fridge. Hahahaha! So, we turned that part to the back, put the cake topper on, and off I went to get married.
We cut the "light bulb" piece out first to feed each other, and Greg's first words after eating it were, "It's amazing!" Our friend, Dan, gave a toast to how good it was.

I'm incredibly proud of that cake. I would be happy to do it for other people, seeing as I definitely have a feel for the whole process, even more than when I did the practice cake. It was tons of fun for me, and I loved knowing that I did something that cool and memorable.
Thursday, June 7, 2012
Work Discovery

The cool thing about my job is that I see hundreds of original artworks in a week. Sometimes I don't really pay attention to things because, well, I see hundreds of original artworks in a week (or day, depending on how the schedule goes). Then there are the times where I find myself slowing down and really focusing because I'm looking at a work by one of my favorite artists, and I'm blown away by the fact that I'm standing there, face to face with the same piece of work that the artist made. I usually feel like I'm having some sort of spiritual experience. (Not kidding, art viewing can be very church-like for me.)
And then there are the times when I discover something that I've never seen before by an artist I've never heard of. The most recent discovery is Rachael Robinson Elmer. She did a series of postcard prints that are amazing in their early nod to Modernism. She's so unknown, that a Wikipedia page doesn't even exist for her! She completed two full sets of postcards, after studying at the Art Students League under several well-known American artists, such as John Henry Twachtman. I don't know how many editions of these prints exist, but I am excited to have discovered some of them. She died at the age of 41, while serving with the Red Cross during World War I. However short her life may have been, I'm glad that she produced these works during that time.
Image from http://lockkeeper.com/features/rachael/woodblock.htm
Monday, May 28, 2012
DIY Wedding Suggestions

1. Have fantastic friends and family. You are only one person, plus your significant other, that's only two. You two can't do everything, no matter how Type A and control freak you want to be. (Oh, is that just me?) Friends and family who are willing to give up time, share their talents, and be there for you not only help you make light work, it also makes you realize how much you are loved.
2. Read A Practical Wedding online and I highly recommend purchasing the book. The best advice she had at the beginning of the book was that if any wedding magazine or book made you feel like what you wanted was "less than" somehow, throw it out. I'd already done that, but it was nice to have permission. She not only covers doing your own flowers, making your own cake, making table runners, etc., but the book covers some of the emotional aspects of getting married, which are pretty important.
3. Use Blooms by the Box. I found this flower wholesaler through A Practical Wedding, and was impressed from the beginning. They have a DIY Wedding Flower guide you can download for free, and also includes a 5% off coupon when you do. Their flower consultant, Diana, will email you to just touch base, but isn't pushy at all. Diana exchanged many emails with me, understanding my budget limits, my flower desires and helping me figure out how to get the flowers I wanted under budget. Plus, when I got a call last week that the main flower I was going to use wasn't going to be in stock because of a growing season issue, Diana walked me through changing my order, and in less than half an hour I had a whole new flower plan. I cannot gush enough about how great this company is. Use them!
4. Use Etsy. Jewelry, hair accessories, ideas, and so much more abound at Etsy. I love supporting small artisans, and I've been able to keep some of my searches local to my area. If you really want unique things, this is one of your best bets for reasonably priced things that you will love.
5. When people offer you things for free, take them. When people offer to put you in touch with friends who can help you, do it. If you're not hiring a ton of people to help you out, let friends and friends of friends carry some of that burden.
6. Prioritize. One of my favorite things I saw that I made fun of was a bridal suggestion for "bridesmaids bouquets that make a statement." Have you ever been to a wedding and though, "Oh, wow! Those bridesmaids bouquets are really making a statement!" If you have, then kudos, but I don't know that I have. Think back to the weddings that you've loved, what were the things that you liked the most? Can you re-create those with your own spin?
Do what makes you happy. DIY is hard, I'm not going to say it's easy. (Baking your own cake takes a lot of time), but you can make it fun, and easier than some magazines and websites would have you believe.
Have fun! And I'll see you when I'm married!!
Image of Lego upcycled journal from Moonlight Bindery on Etsy.
Thursday, May 10, 2012
Fun things on Etsy

Despite arguments about the word "curate" and what it means to curate, I think that we all are curators of what we love in life. Be it a group of images on Pinterest, or a selection of items we collect in our homes, the heart of curating, for me, is collecting things that you value and treasure.
My personal curated collection involves a lot of jewelry. I love fun earrings, and lately, I've really been drawn to unusual necklaces. (Like at the ACC Craft Show.) I recently bought myself a necklace from Merriweather Council on Etsy, that I am very excited to get in the mail later this week. I ordered a "g" in teal on coral fabric. I love that I could choose everything, from the letter, to the case, to the shape of the small hoop, to the colors of the embroidery thread to the background. And knowing me, of course I went with pink and green(ish).
In addition to adorable, personalized necklaces, she makes these cute embroidered hoops. I personally really like the "ugh" one (seen above) as it describes my feelings about waking up every morning.
The coolest thing about her shop is that she started it pretty soon (as in 47 hours) after she graduated from college. I love that she pursued her dream and is turning it into things that are beautiful, personal, and to be treasured.
She also does so many other personalized things, so check out her shop for adorable embroidery!
Thursday, April 26, 2012
Blogging Elsewhere
I might be a little bad at posting here, but I am excited to announce that I wrote a guest blog post for the American Craft Council that you can find here. It discussed my research process for my thesis on OBJECTS: USA back in 2010. Sure, it was a while back, but the materials are still in the library. The most important thing I think people should take away from it is that if you're researching a craft topic, don't neglect to look for funding. The Center for Craft Creativity and Design in Hendersonville, NC, is very generous and excited to help people uncover new ideas and research. The Craft Council would also be very excited to have you come to their lovely library space and research. Enjoy the post, and while you're there, check out the other great things the Craft Council is doing.
Saturday, April 14, 2012
American Craft Council Baltimore Show
Back in February (was it already that long ago?) I took a Saturday for my annual pilgrimage to the American Craft Council show in Baltimore. I was excited as I missed last year's show, and this year the Craft Council had special categories, including "Under $100" for young craft collectors. (That's me!)
I did my usual walk-through, noting the things that I really liked and considering going back as I navigated the aisles. Then I came to Andrea Haffner's booth. Her work is astounding. I loved her wall hangings, and could have spend hours staring at them. She uses nature in her works--literally--pulling leaves, stalks, flowers, and other things from the earth, matching them with contrasting colors and shapes. I looked over her necklaces, and knew that one of those was going on my list of things I wanted.
I continued on my journey, getting halfway down the next aisle before I realized I needed to turn around, lest someone take the necklace I had fallen in love with. I chose a long rectangular piece, with a turquoise background with pink peppercorns above small pieces of straw, to create the illusion of flowers. I love this necklace. And her other jewelry comes in colors and shapes for everyone!
As much as I enjoyed other things at the Craft Council show, this is one of the best things I've ever seen. Unique, beautiful, and she has photographs as well as the amazing wall hangings that I am already saving up for.
Subscribe to:
Posts (Atom)